
October 18, 2026
Greetings, FoodFirst Community!
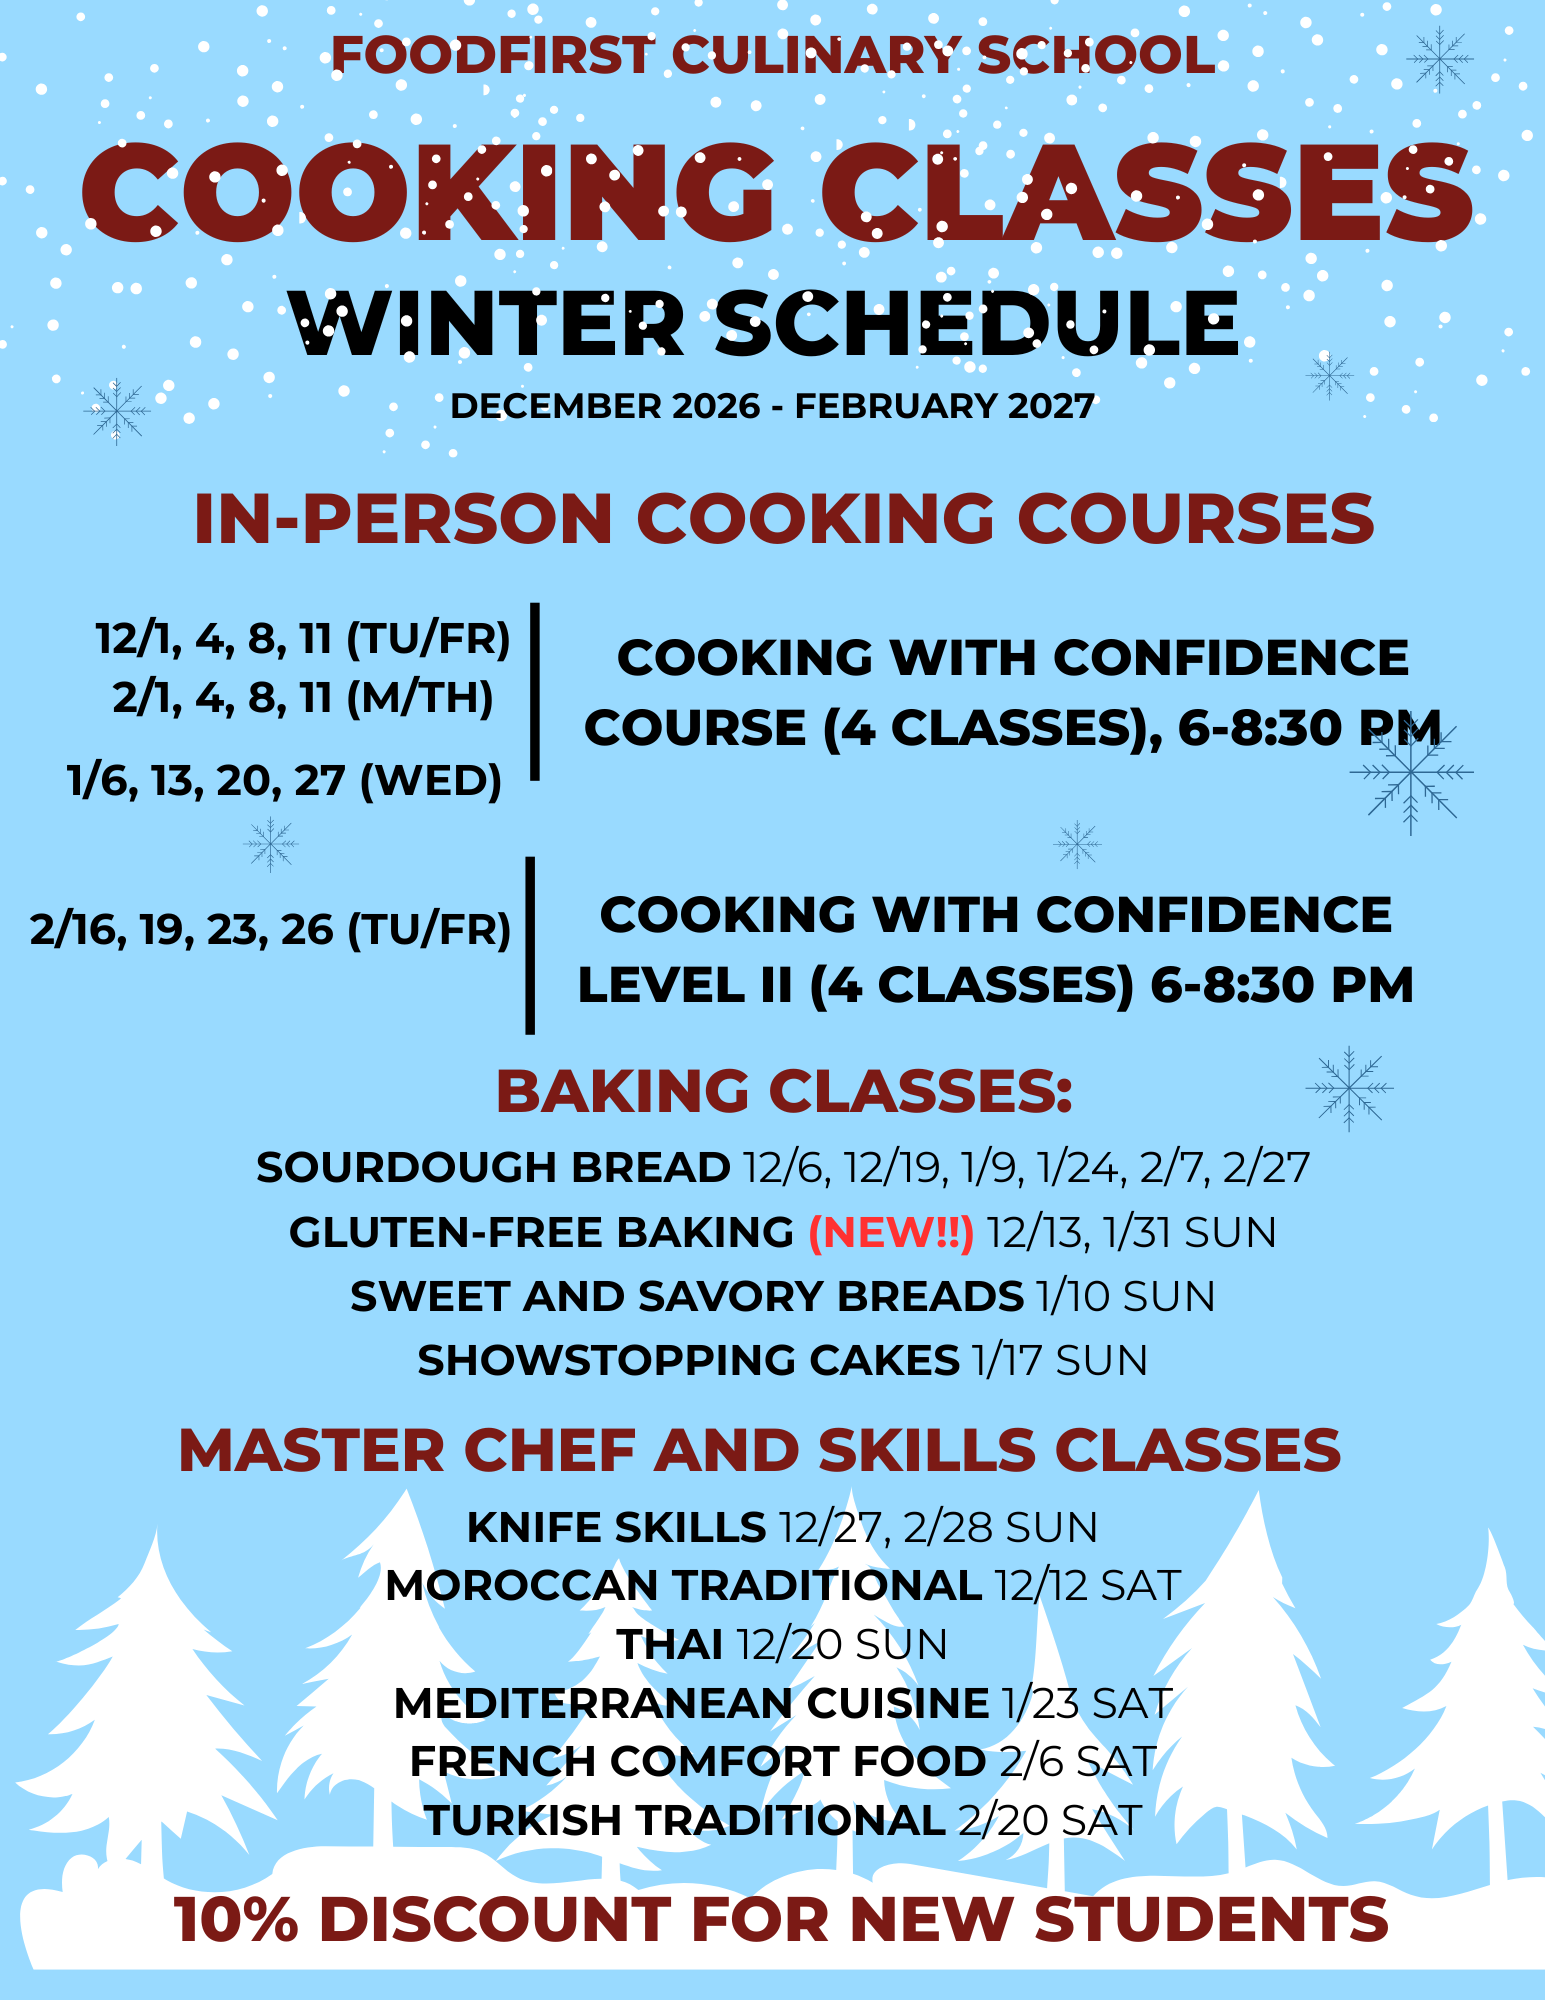
Let’s start with the updates from FoodFirst. The winter schedule is out and classes are already filling up! There is a new baking class on how to bake gluten-free desserts. I am offering both regular Cooking with Confidence course and the new Cooking with Confidence Level II, as well as the usual lineup of fun Master Chef and baking classes. Check out the full schedule below.
What’s for Dinner?
A newsletter for home chefs about food, cooking, and enjoyment of food
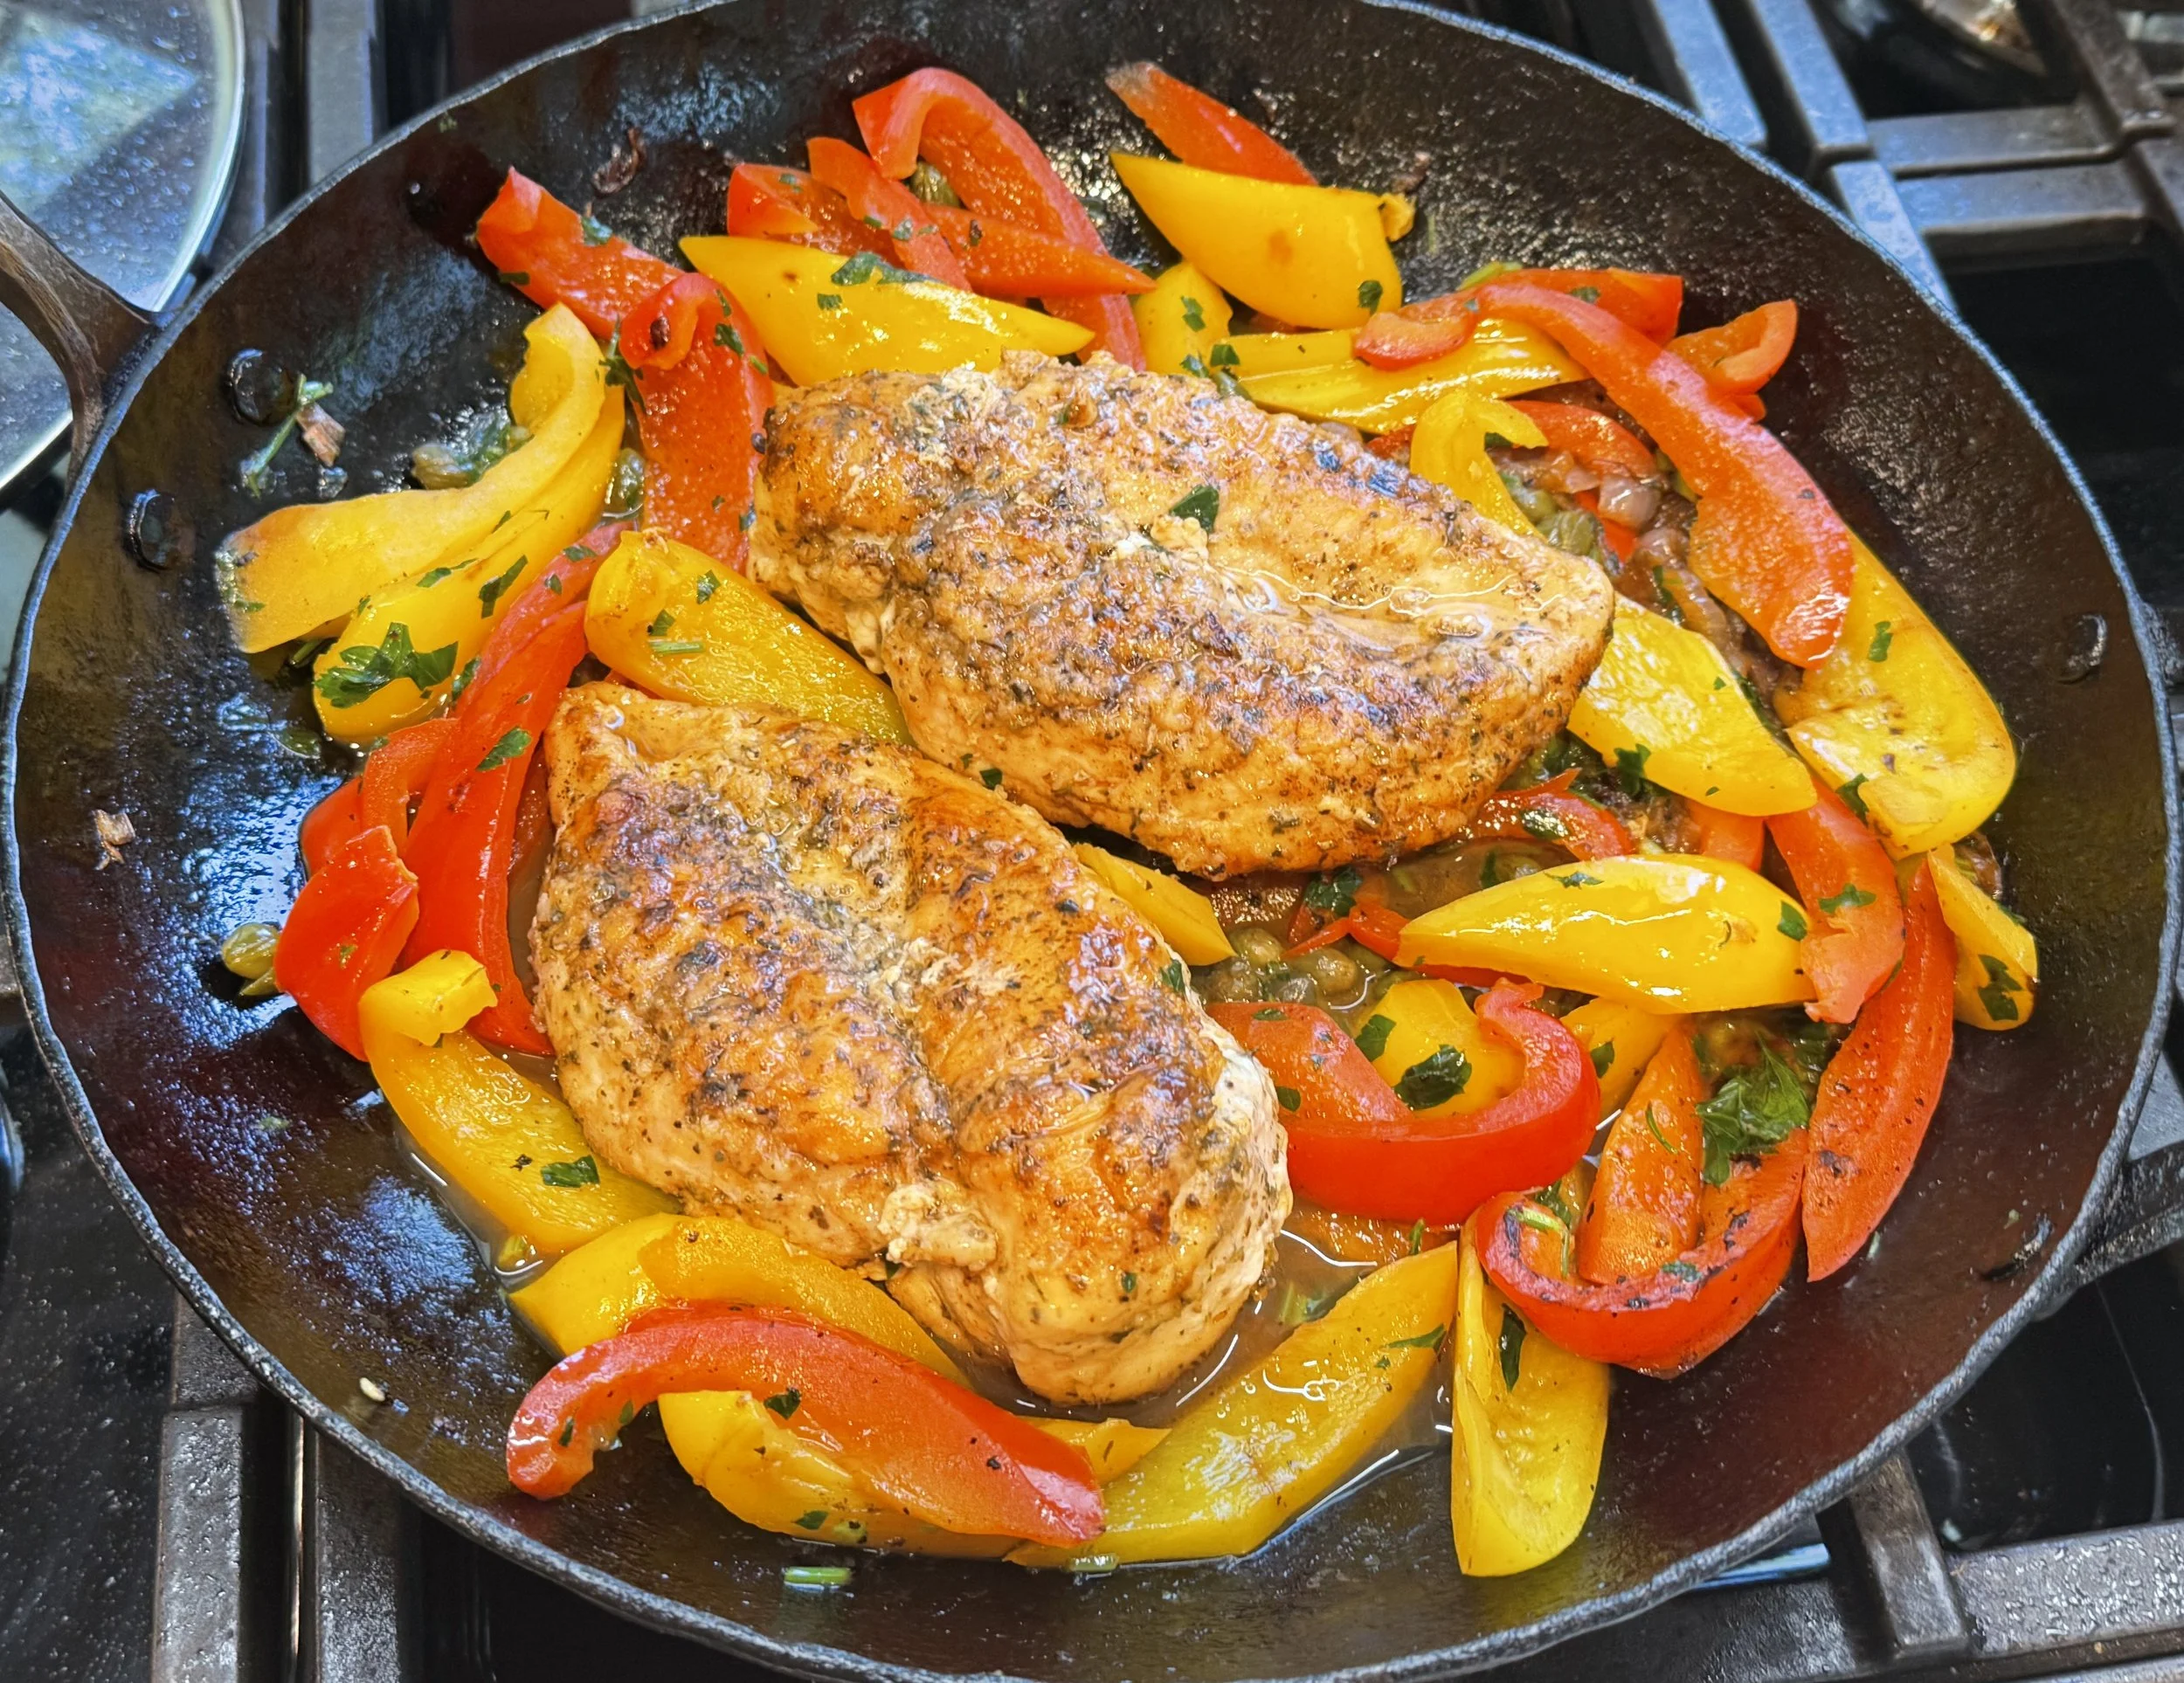
But let’s talk about food! What’s cooking in your kitchen these days? As the weather is cooling off here in DC, I am craving comfort food. For busy people, Chicken Piccata offers a fantastic supper that can be prepared in 20 minutes. All you need is a couple of chicken breasts (boneless thighs will also work!) and some bell peppers (or zucchini! oh green beans! really, any quick-cooking veg that goes with lemon will work well here). You can serve it with pasta (of course), rice, mashed potatoes, or white crusty bread, like a rustic baguette from your local Lidl. I recommend cooking it in a nice heavy skillet.
Chicken Piccata with Bell Peppers (serves 3-4):
2 chicken breasts (about 1 1/2 lb)
1-2 tsp Italian seasoning or oregano
1 Tbsp flour
2-3 Tbsp olive oil and/or butter
2 shallots, sliced thinly
2 bell peppers (any color), sliced
2-3 Tbsp capers
3-4 Tbsp minced parsley and/or dill
1/4 cup white wine or water
1/4 cup chicken broth or water
1 Tbsp lemon juice
Salt, black pepper.
First prepare your chicken. If you want it to cook faster, you might want to pound it to flatten it out, or to cut it horizontally into cutlets. If you don’t mind cooking it a few minutes longer, leave as is. Season the chicken with Italian seasoning or oregano, salt, black pepper, and finally dredge in a bit of flour.
Next, heat up your pan and then add butter with olive oil (or just oil). Sear the chicken on medium heat until golden. Cover the pan, lower the heat and cook for a few more minutes, flipping periodically, until cooked through (150F on the meat thermometer). Remove from the pan and set aside.
To make the sauce, thinly slice the shallots and sauté them in the pan drippings for a couple of minutes. You can add a bit of butter or oil if the pan is too dry. Next, add sliced bell peppers, parsley, and capers. Continue sautéing for 2-3 minutes. Add white wine and broth, season with salt and black pepper, and for for a couple more minutes, until the alcohol cooks off and the sauce thickens a bit. Add lemon juice. Return the chicken to the pan and heat through. Serve over pasta, mashed potatoes, or rice, with fresh herbs, optional feta, and more lemon, if needed.
What’s for Dessert?
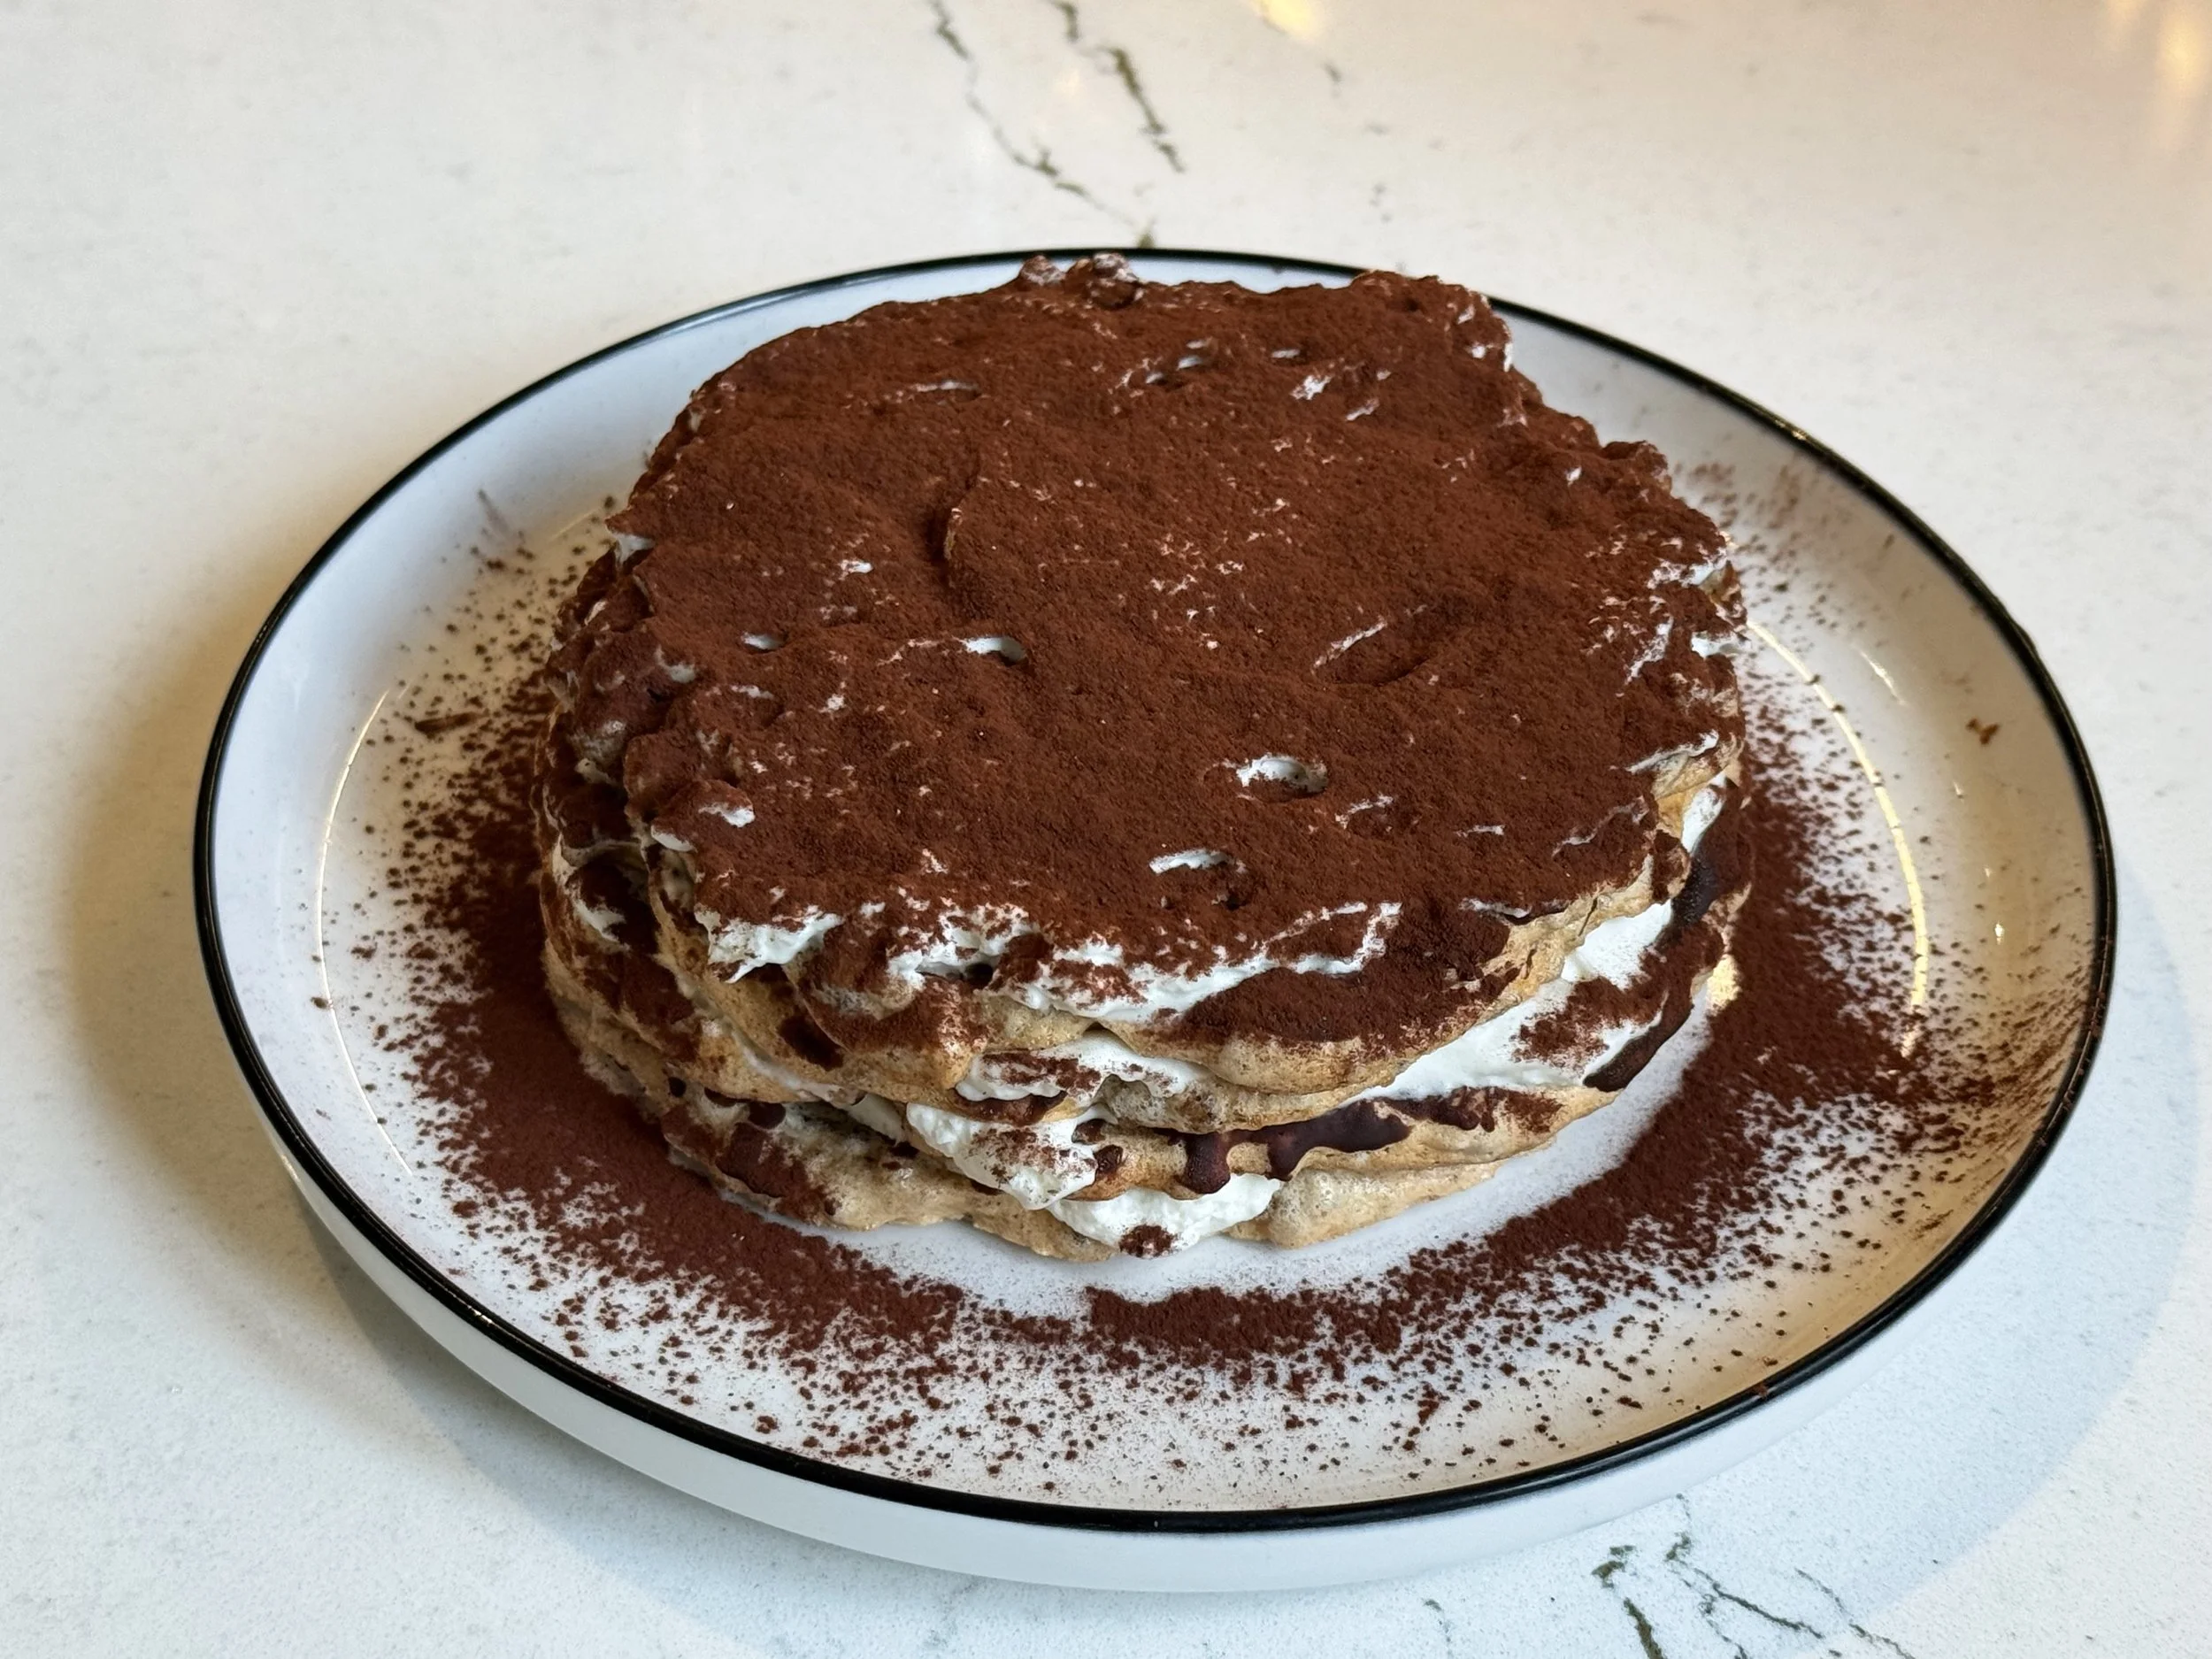
Recently, I have become obsessed with dacquoise desserts (pronounced dakwɑz). You probably tried this amazing dessert in some fancy restaurant or saw it on display in a particularly fancy bakery, and most of you probably think it’s way outside of your baking capabilities. This is really not the case! Sure, making a spectacularly-looking dacquoise can indeed be challenging because of all the specialized equipment bakers use to make it look super pretty. But a home-made version? It can be just as delicious and look perhaps less impressive but hey, the beauty is in the eye of the beholder! I personally find the one that I made the other day very pretty! Don’t you agree? :-)
If you are wondering what the heck is dacquoise, it is a French dessert made with layers of nut meringue—usually almond, hazelnut, or a combination—sandwiched with buttercream, ganache, whipped cream, or another creamy filling. The meringue layers are typically crisp on the outside and slightly chewy inside, softening as they absorb moisture from the filling.
The most challenging part about the dacquoise is making the meringue correctly. A lot of people struggle with it! They under-whip or overwhip egg white, resulting in a collapsed meringue. There are a few tricks to whipping egg whites:
Separate eggs when they are cold but whip whites when they are at room temperature.
Use very clean bowl and beaters and add a squeeze of lemon juice and/or a pinch of salt.
Add sugar gradually, starting at foaming stage.
Stop when the whites reach desired stiffness.
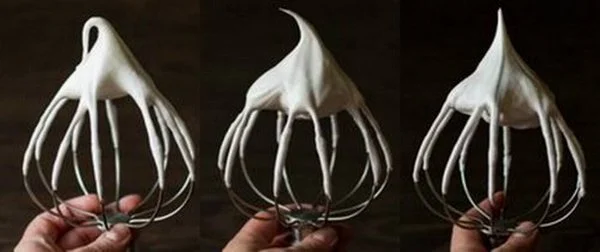
On the photo below (source), you can see three stages of whipping whites, from soft (left) to firm (middle) to stiff (right). For the perfect meringue (and souffle, and Pavlova, and a million other baked creations), you want the one in the middle: the peak curves but does not flop. Once you master this, your meringue will be perfect every time! You can read more about making the perfect meringue here and here.
Now for the recipe! While the traditional dacquoise is made with the real meringue disks (basically, you whip the egg whites as described above, fold chopped and toasted nuts into the whipped whites, then pipe into discs, and then bake on 225F for a couple of hours and then cool for another couple of hours), it takes a really long time. The adaptation that I fell in love reduces this to mere minutes (source). I call it faux dacquoise, to distinguish from the traditional method.
Faux Dacquoise with Walnuts
Makes one 8-inch cake.
Ingredients:
4 egg whites (with a few drops of lemon juice and/or pinch of salt)
150 g fine sugar
150 g finely chopped walnuts or almonds
1 tsp cornstarch or flour
For the filling:
(Optional) 80 g dark chocolate
300 ml heavy whipping cream (Variation: 200 ml cream with 100 g mascarpone)
1 Tbsp powdered sugar
(Optional) 2 Tbsp strong espresso OR vanilla OR another flavoring
(Optional) 2 g unflavored gelatin
For the topping:
High quality cocoa powder, OR
Grated dark chocolate, OR
Raspberry syrup or coulis, OR
Whatever suits your fancy at this moment!
Method:
Finally chop and lightly toast the nuts.
Whip the egg whites until firm peak, adding the sugar along the way.
Fold the cooled nuts into the whipped whites.
Preheat the oven to 375F.
Draw five 8-inch circles (or six 7-inch, or four 9-inch) on two pieces of parchment that fit into your baking sheets. Flip the parchment so the pen marks are on the other side. Lightly brush the visible circles with neutral oil.
Divide all the whipped whites between the circles. Using a spatula, spread it to fill the circles. (Of course, you can also pipe it, but it is far less fun!)
Bake for 5-8 minutes, until they turn light golden color. Leave them to cool. Take the disks off the parchment.
If using chocolate, melt it on the water bath and using a pastry brush, brush each cooled disk with the melted chocolate. Leave to cool off.
Whip the cream (or cream with mascarpone) with the powdered sugar and optional flavoring. Optionally stabilize with gelatin (here is how).
Assemble the cake, layering the disks and spread some whipped cream between the layers. Shake some cocoa powder or grated chocolate on top, or drizzle with raspberry coulis.
An even easier variation would be to fold the toasted chopped nuts into the whipped cream, and bake the meringue disks by themselves. Enjoy! And let me know how it works out!
EQUIPMENT FINDS AND TIPS
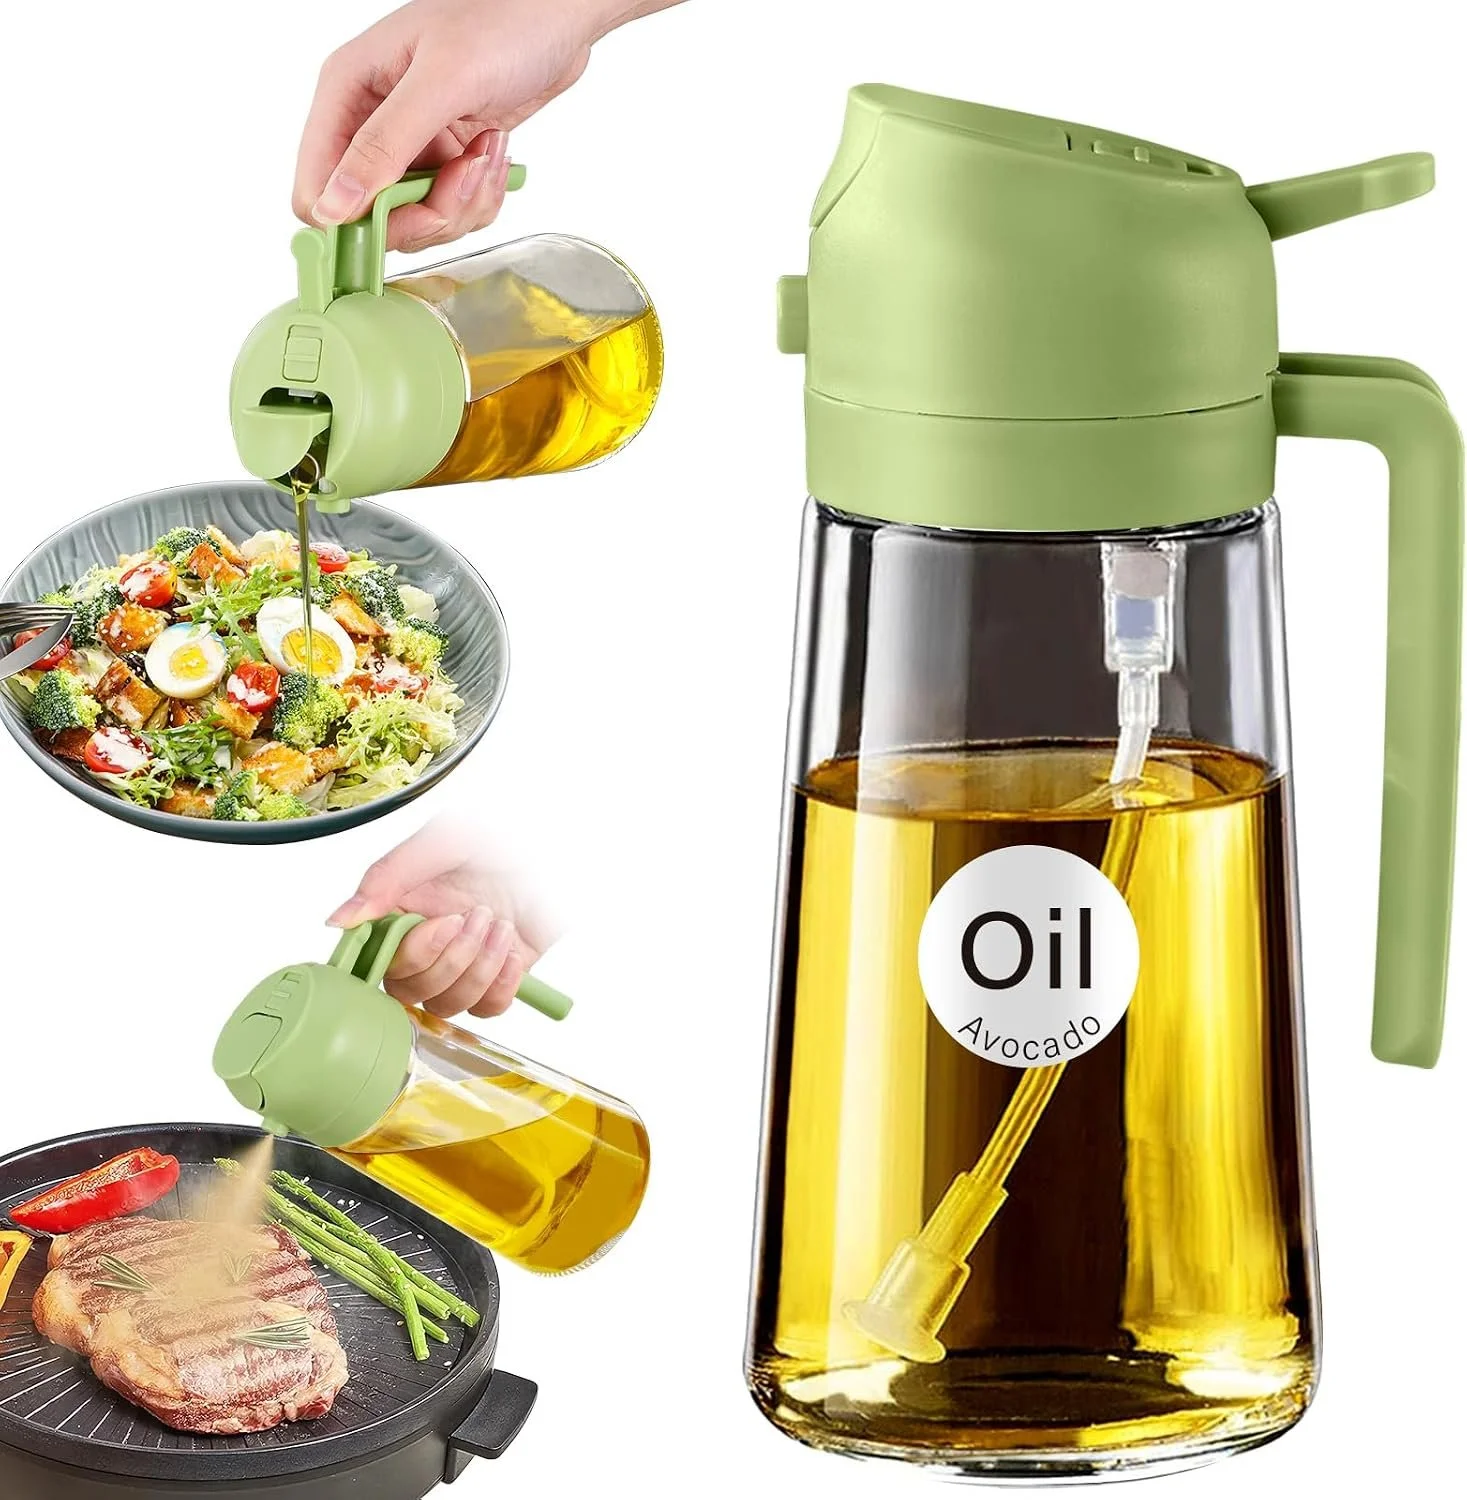
A lot of people ask me about cookware and cooking equipment that I use, so I decided to add a section to the newsletter featuring just one piece of cookware or equipment that I find particularly useful. One such piece of equipment is this oil bottle that has both pourer and spray. I am so used to using both spray and pourer that I really miss it when I travel! I find it particularly helpful when I need to lightly oil my veggies for roasting or spray the top of my bread. Given how inexpensive it is, I would recommend it to anyone who cooks regularly. Here is the link to this product on Amazon (please note there are many versions and I only tested the one that I am sharing here).
FoodFirst Updates
Finally, as we are inching toward the holiday season, remember that cooking classes make a fantastic gift! You can gift an individual class or the bestselling Cooking with Confidence course. I particularly recommend my very popular Cooking Night for Two. Those are great for romantic dates as well as a fun event for parent with child, grandparent with grandchild, or two friends. You can pick any of my Master Chef or baking classes for the menu, or suggest your own! Likewise, individual culinary coaching is an excellent gift, particularly for folks with specific nutritional requirements or health concerns.
You can find gift cards for a variety of dollar amounts in the store.
Also a reminder that FoodFirst is on google maps! If you took a class and would like to leave a review, please go here.

What’s for Dinner Archive
2026 - 08 - 10 Newsletter: Shrimp fettuccini, summer fruit crisp
2026 - 04 - 05 Newsletter: Purple salad, no-churn ice cream
2026 - 02 - 07 Newsletter - Onion soup, creme brulee
2025 - 12 - 24 Newsletter - Christmas Appetizers, Main Course
2025 - 11 - 23 - Newsletter - Thanksgiving Cranberry Sauce, Stuffing, and Apple Pie
2025 - 10 -14 - Newsletter - Sausages and Apples
2025 - 09 - 23 Newsletter - Roasted Veg and Chocolate Souffle
2025 - 09 - 10 Newsletter - Goulyash and Banoffee Pie
2025 - 08 - 25 Newsletter - Kebobs and grilled peaches
2025 - 08 - 10 Newsletter - Fish and s’mores
2025 - 07 - 26 Newsletter - Cold cucumber soup and Ina Garten’s panna cotta
2025 - 07 - 13 Newsletter - Chicken tagine and profiteroles